iOSでディープラーニングが簡単に実装できる公式ライブラリ「Turi Create」
Appleでディープラーニングが簡単に実装できるツールといえば「Create ML」が有名です。
iOS13でも新たにオブジェクト検出 / オーディオデータ分類 / アクティビティの分類などが追加されます。
しかし、Create MLの開発環境はXCodeのみと限られているため、やや扱いづらい点もあります。今回はPythonやJupyter / Colaboratoryの知見をいかしつつiOSアプリ向けに機械学習を組み込みたいという方向けに「Turi Create」をご紹介します。
Turi Createとは
Appleが2016年に買収したTuriという企業が開発した機械学習のライブラリです。
Turi Create simplifies the development of custom machine learning models.
Turi Createは機械学習モデルをシンプルに実装できるため、ディープラーニングの理論に詳しくないエンジニアでも気軽に試すことができます。
Turi Createを活用すると以下のようなモデルを簡単にiOSアプリケーションに組み込むことができます。
- Recommender systems(推薦システム)
- Image Classification(画像分類)
- Drawing Classification(描画分類)
- Sound Classifier(音声分類)
- Image similarity(類似画像)
- Object Detection(物体検出)
- Style Transfer(画風変換)
- Activity Classifier(アクティビティ分類)
- Text classification(自然言語処理)
今回は上記のStyle Transferの実装を進めながらTuri Createを紹介していきたいと思います。
Colaboratoryを使ってStyle Transferを実装する
公式サイトがStyle Transferの実装方法を紹介しています。
実装を進めていくにあたりGPU環境が無いとトレーニングが速く進みません。公式サイトの説明ではCPU環境でトレーニングをおこなうと1日くらいかかるとのことでした。
そこでオススメしたいのがGoogleのColaboratoryです。今となっては非常に有名なサービスですが無料でGPU環境を提供してくれます。
ただし!2019/6/12現在ColaboratoryのCUDAのバージョンは10なのですが、Turi Createがバージョン8を推奨の動作環境としているためGPU環境でのトレーニングがうまくできません。
こちらを解決するために色々と試行錯誤したのですが、最終的に下記のブログを参考にして実行することができました。
コードも抜粋します。
!pip install turicreate==5.4
# The wrong version of MXNET will be installed
!pip uninstall -y mxnet
# Install CUDA10-compatible version of mxnet
!pip install mxnet-cu100==1.4.0.post0
Style Transferを実装するためにコンテンツ画像とスタイル画像を用意する必要があります。ColaboratoryにはGoogle Driveを簡単にマウントできる機能がありますので、Google Driveのマイドライブに「content」と「style」というフォルダを作成しそちらに画像を格納していきます。
詳細は以下の流れになります。
- Google Driveにcontentとstyleというフォルダを用意してそれぞれ画像を格納する
- Colaboratory上でマウントする
from google.colab import drive
drive.mount('/content/drive')
- 画像を読み込む
content = tc.load_images('/content/drive/My Drive/content/')
styles = tc.load_images('/content/drive/My Drive/style/')
- トレーニングを実行する
model = tc.style_transfer.create(styles, content)
GPU環境でも学習に1時間くらいかかりますので気長に待ちましょう。
学習が完了するとこんな画像が表示されるようになります。 ジョブズくんと葛飾北斎の絵の画風が混ざって・・・
 +
+ 
こんな画風に変換されました!

なんとなく趣を感じますね。
Colaboratory上で実行するコードはこちらにおいておきました。
Core MLにデプロイしてiOSアプリに組み込む
Colaboratoryで学習させたモデルをエクスポートして、iOSプロジェクトに組み込みを行います。
model.export_coreml('MyStyleTransfer.mlmodel')
Colaboratoryの画面の左カラムにモデルファイル(mlmodel)が出力されていますのでダウンロードしてください。
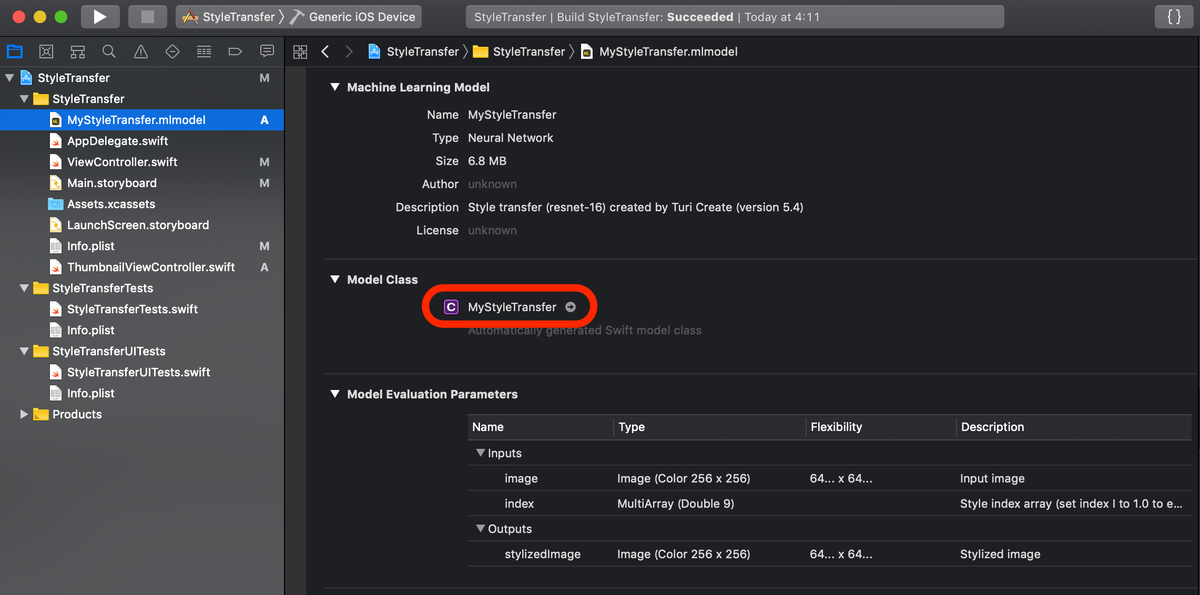
次にXCodeを立ち上げて、モデルファイルをドラック&ドロップします。
コードについてはGitHubをご覧いただくとして、要点を解説したいと思います。
let numStyles  = 8
let styleIndex = 3

let styleArray = try? MLMultiArray(shape: [numStyles] as [NSNumber], dataType: MLMultiArrayDataType.double)

for i in 0...((styleArray?.count)!-1) {
    styleArray?[i] = 0.0
}
styleArray?[styleIndex] = 1.0
- numStyles:styleフォルダに入れたスタイル画像の数
- styleIndex:適用するスタイル
上の公式サイトの画像を例に言うと、8枚のスタイル画像があるのでnumStylesは8、styleIndexが3の場合は0からカウントするので右上の薪のスタイルが適用されることになります。
画像にStyle Transferを適用するコードは以下の通りです。
// initialize model
let model = MyStyleTransferModel()

// set input size of the model
let modelInputSize = CGSize(width: 600, height: 600)

// create a cvpixel buffer
var pixelBuffer: CVPixelBuffer?
let attrs = [kCVPixelBufferCGImageCompatibilityKey: kCFBooleanTrue,
             kCVPixelBufferCGBitmapContextCompatibilityKey: kCFBooleanTrue] as CFDictionary
CVPixelBufferCreate(kCFAllocatorDefault,
                    modelInputSize.width,
                    modelInputSize.height,
                    kCVPixelFormatType_32BGRA,
                    attrs,
                    &pixelBuffer)

// put bytes into pixelBuffer
let context = CIContext()
context.render(ciImage, to: pixelBuffer!)

// predict image
let output = try? model.prediction(image: pixelBuffer!, index: styleArray!)
let predImage = CIImage(cvPixelBuffer: (output?.stylizedImage)!)
「MyStyleTransferModel()」は出力したモデルファイル(.mlmodel)のModel Classです。自分の環境に合わせて置き換えてください。

CIImageのデータを使いますので、UIImageやCGImageの場合は変換をかけるようにしましょう。
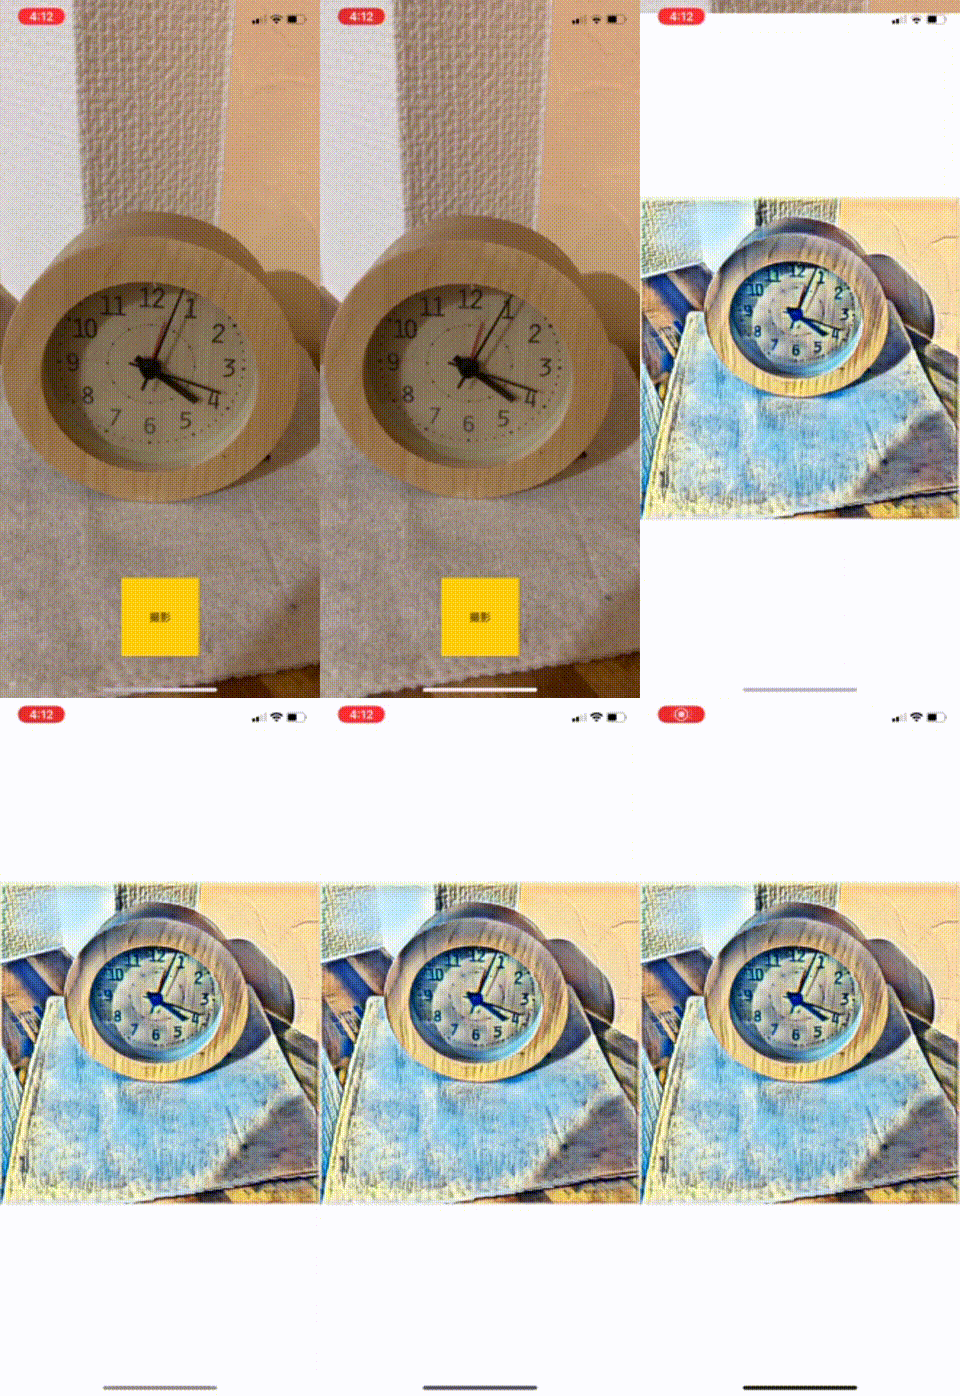
iPhoneから撮影して画風変換を行なってみた結果がこちらです。

こちらもサンプルをGitHubに用意しました。写真を撮影した後にCGImageからCIImageに変換し回転させてから画風変換を行なっています。
何かのお役に立てれば幸いです。
